Rock Art & Petroglyphs
Drawing a Rock Art Panel by Hand
A hand drawing of a rock art panel is a scaled, interpreted record made in the field, not a photograph.
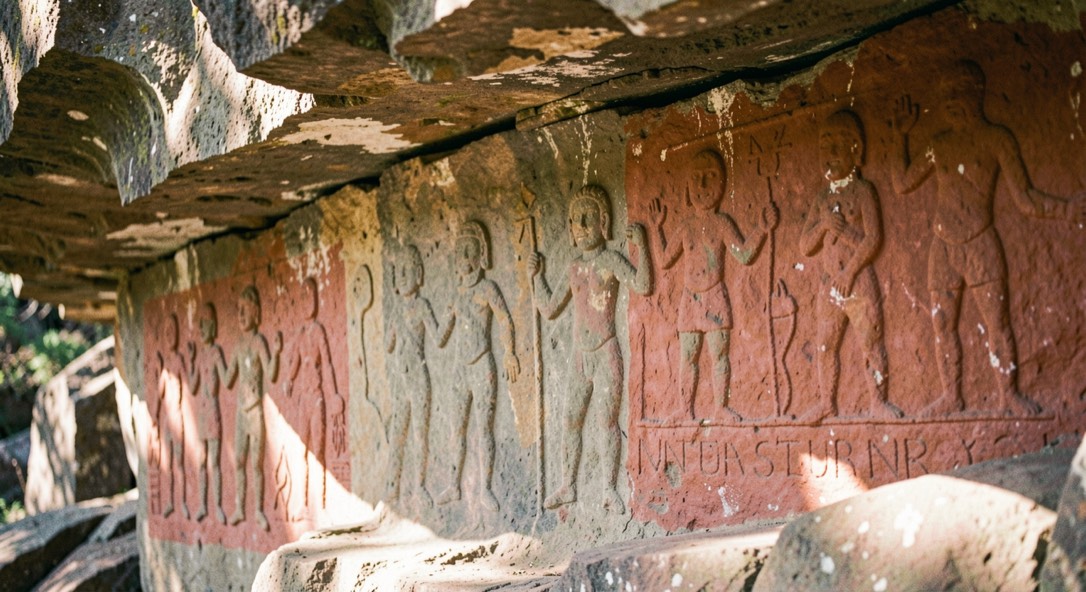
A hand drawing of a rock art panel is a scaled, interpreted record made in the field, not a photograph. It fixes the position, size, and condition of each figure at a known moment, and it forces the recorder to look at the rock longer than a camera does. For that reason the drawn record still matters: it is the only record that shows what a recorder judged to be a figure, a crack, or a stain.
Why draw a panel when a camera is faster?
A photograph records light. A drawing records decisions. When you trace a petroglyph on transparent film or draw it freehand on gridded paper, you decide where a pecked edge ends and where a natural spall begins. That judgment is the record. Cameras flatten relief, and raking light that reveals a faint figure at 4 p.m. may vanish by 5 p.m.; a drawing made under that light preserves what the light showed.
Scale is the second reason. A drawing made at 1:10 or 1:5 on a measured grid carries dimensions that can be checked later against the rock. Photographs need a scale bar and a known camera position to do the same, and even then perspective distorts panels on curved sandstone. On a vertical face with figures at different depths, a drawing on gridded film keeps relative positions readable in a way a single frame does not.
There is also the matter of the recorder's attention. Drawing a panel takes an hour or more. In that time, you notice peck marks, reworking, lichen growth, and recent scratches that a quick visit would miss. This is the same principle that applies to any careful record of a surface, whether it is a rock face or a page: the act of reproducing a mark by hand slows the eye. Readers who follow how handwriting is taught and assessed in French schools will recognize the argument, since the same logic of gesture, scale, and observation runs through the material at handwriting practice and its difficulties.
What equipment and scale do you actually need?
A working kit is small. Bring gridded transparent film (mylar or acetate), a fine permanent marker, a soft pencil, a 30 cm ruler, a plumb line, a measuring tape, a clipboard, and a camera for the overview shot. Chalk or flagging tape marks the panel corners, but never chalk the rock itself; tape on the ground or on adjacent stone is enough.
Set the scale before you draw. For a panel under a meter across, 1:5 is comfortable. For a large panel with many figures, 1:10 keeps the sheet manageable. Draw a north arrow and a scale bar directly on the film, and write the site number, date, recorder's name, and light conditions in the margin. If the panel is on a slope, note the tilt; a drawing made without that note can be misread later as a plan view.
Use a plumb line to establish vertical. Most panels are not level, and a drawing that assumes a horizontal baseline will rotate every figure. Fix two reference points on the rock, such as a distinctive crack or a corner of the panel, and measure everything from them. Record those points in the field notes with their distances apart.
How do you trace a figure without damaging the rock?
Never touch the rock surface with chalk, paint, or abrasive. Tracing film is held against the rock or, better, held slightly off it on a frame, and the figure is drawn by eye. Direct contact with film can abrade soft sandstone and can lift lichen; on painted panels, contact is unacceptable. In many jurisdictions, direct tracing of painted rock art is prohibited outright.
Work from the largest features to the smallest. Outline the panel boundary first, then the major figures, then internal details such as peck marks or pigment edges. Use different line weights: a solid line for certain edges, a dashed line for uncertain ones, and a dotted line for cracks that are not figures. This convention is standard in rock art recording and lets a later reader see what the recorder doubted.
Record condition as you go. Note exfoliating flakes, animal scratch marks, and recent graffiti in the margin, with their position on the grid. A drawing that shows only the figures and omits damage loses the information a conservator needs most.
Why does the drawn record still matter?
Rock art changes. Sandstone exfoliates, lichen spreads, visitors touch surfaces, and in some cases panels are submerged by reservoirs or lost to construction. A drawing made in 1975 may be the only surviving record of a panel that no longer exists in readable form. That alone justifies the time it takes.
Drawings also support comparison. Two recorders working at different sites with the same conventions can place their sheets side by side and compare figure sizes, techniques, and panel layouts. Photographs taken by different people under different light rarely allow that. The drawn record is a standardized instrument, and its value grows as the set of drawings grows.
Finally, drawings are interpretable. A reader can see the recorder's reasoning: which lines were certain, which were doubtful, which were excluded. A photograph offers no such transparency. For anyone planning a site visit, a published drawing is often the best preparation, because it tells you what to look for and where to stand.
What should a site visitor know before looking at panels?
Check land status first. Many panels are on federal, state, or tribal land with specific rules about photography, touching, and even standing close to the rock. Some sites require permits; others ask visitors to stay on marked trails. The Archaeological Resources Protection Act in the United States and comparable provincial and national laws elsewhere make it illegal to disturb, remove, or deface rock art on protected land.
Bring binoculars. A panel that looks blank from the trail often resolves into figures when viewed from an angle with low sun. Early morning and late afternoon light is best; midday sun flattens relief. Do not use chalk, flour, or water to enhance figures. This practice, sometimes suggested in older guides, damages the rock and is prohibited at most sites.
If you want to make your own record, draw in a notebook from a distance rather than tracing on the rock. A freehand sketch with a scale bar and a note on light direction is a legitimate field record and causes no impact. Leave the gridded film and the measuring tape for permitted work with a project that holds the necessary authorization.
How does a drawn record fit with other documentation?
A drawing is one layer among several. A complete record usually includes overview photographs, close photographs with a scale bar, GPS coordinates, a written description, and the drawing itself. Each layer answers a different question. The photograph shows texture and color; the drawing shows position and scale; the notes show condition and context.
When you consult an archive, ask for all layers, not just the drawing. A drawing without its field notes can mislead, because the conventions used by the recorder may not be obvious. If the notes are lost, the drawing is still useful, but its uncertainties are harder to read.
For readers who plan visits, the practical takeaway is simple. Look at published drawings before you go, stand where the recorder stood if you can determine it, and record what you see in writing. The drawn record persists because someone took the time to look carefully, and that habit is available to any visitor with a notebook and patience.
Source: nps.gov.